• Embracing Solitude: How Seniors Can Thrive Alone

    The age group that is often considered the loneliest is the elderly population. As we age, we experience loss of loved ones, retirement, and physical limitations that can contribute to feelings of isolation. Nonetheless, there are ways for older adults to overcome loneliness and lead fulfilling lives!

    Keep Moving!

    One way for seniors to combat loneliness is by staying active and engaged in their community. Joining a local senior center can help foster connections with others. Participating in group activities like exercise classes or hobby clubs can also help. Volunteering is another great way to stay engaged and make a positive impact in the community.

    Additionally, technology can be a powerful tool for combating loneliness in older adults. Encouraging seniors to learn how to use social media platforms to stay connected with family and friends can help. Joining online support groups can also combat feelings of isolation.

    Some of the best places to meet interesting people are the places you shop at regularly. I enjoy seeing my local bulk food worker, cashier, and farm store clerk. I have become accustomed to limited interactions with people beyond that. It suits me just fine and I feel like I am living my best life.

    Embrace Solitude!

    A big trend lately is to embrace your solitude, many people have lost friends and family members for various reasons. Finding interesting channels on YouTube fosters new interests in different hobbies. These include cooking, hiking, traveling, pet care, and workouts. All these activities you can do with or without company. At least you will know you are not alone in being alone!

    Sometimes just going to the movies by yourself can be fulfilling. Splurging on popcorn, snacks, and drinks you packed in can make it even better. A solo lunch date. Going to parks, museums, art shows, zoos – all pack a powerful walking punch to get those steps in. If you can’t drive, maybe a little networking will help you find someone to split the costs. This person might also be interested in going. For example, you can find like-minded individuals on the website Meetup. You can also start your own group if you can’t find one.

    Explore!

    Exploring new music tastes (yay to vibrational music!) can make a quiet night not so quiet. Reading the bible can encourage you to strengthen your faith. It can help you detach from modern entertainment that doesn’t add long term value to living well. For example, steering clear of music that has subliminal messages and occult connections. It’s not too late to work out or start a side hustle or start new traditions! Or even grow your relationship with Yeshua!

    Joining an online marketplace like Planet9 Trading Co. where you can network with other crafters can motivate one to step outside their comfort zone. Selling your own creations can inspire you to try new things or perfect old things. Along with celebrating arts and crafts, mark your calendar for regular cook days. Monday Soup day, Taco Tuesday, and Friday Pizza can give one something to anticipate every week.

    Be Grateful!

    Finally, maintaining a positive attitude and seeking professional help when needed can also be beneficial in overcoming loneliness. Counselors or therapists can offer guidance and support for those struggling with feelings of isolation. Positive self-help books can also be on audio if you struggle to read.

    Remember, age is just a number and it’s never too late to make new connections and lead a fulfilling life. So, let’s encourage our elderly population to step out of their comfort zone. They should try new activities. They should also embrace the adventure of building meaningful relationships. Together, we can conquer loneliness and create a vibrant community for all ages!

    The Adventure Machine

    References/Further Study:

    Sources:

    https://www.mayoclinic.org/healthy-lifestyle/healthy-aging/in-depth/aging/art-20046070

    https://www.meetup.com

  • Mediterranean Veggie Skewers: Perfect Campfire Recipe

    Campfire Mediterranean Veggie Skewers with Lemon-Herb Quinoa

    Gather ‘round, fellow adventurers! It’s time to take your taste buds on a journey through the sun-kissed shores of the Mediterranean, all while basking in the glow of your crackling campfire. Get ready for a feast that’s easy to whip up under the stars—Campfire Mediterranean Veggie Skewers with zesty Lemon-Herb Quinoa!

    Ingredients:

    For the Skewers:

    • 1 red bell pepper, diced
    • 1 yellow bell pepper, diced
    • 1 zucchini, sliced into thick rounds
    • 1 red onion, cut into chunks
    • 1 cup cherry tomatoes
    • 1 cup mushrooms, whole
    • Olive oil
    • Salt and pepper
    • Dried oregano or Italian seasoning
    • Skewers (wooden or metal)

    For the Quinoa:

    • 1 cup quinoa
    • 2 cups water or vegetable broth
    • Juice of 1 lemon
    • Zest of 1 lemon
    • 2 tablespoons fresh parsley, chopped (or dried if fresh isn’t available)
    • Salt and pepper to taste
    Instructions:

    1. Prepare Your Campfire:
    Start by building a roaring campfire. Feel the thrill as the flames dance and crackle—this is where the magic happens! If you’re using wooden skewers, soak them in water for about 30 minutes to prevent burning.

    2. Assemble the Skewers:
    Grab your skewers and channel your inner artist! Thread the bell peppers, zucchini, red onion, cherry tomatoes, and mushrooms onto the skewers. Alternate the colors and shapes for a feast for the eyes! Drizzle with olive oil, sprinkle with salt, pepper, and oregano. Give them a gentle toss to coat every morsel.

    3. Cook the Quinoa:
    In a pot (or a campfire-safe pan), combine the quinoa and water (or broth). Bring it to a boil over the fire, then reduce the heat and let it simmer for about 15 minutes until the quinoa is fluffy and the water is absorbed. Once done, fluff it with a fork and stir in the lemon juice, zest, parsley, salt, and pepper.

    4. Grill the Skewers:
    Now, it’s time for the skewers to shine! Place them over the campfire grill or directly on the grate. Let them sizzle and char for about 10-15 minutes, turning occasionally, until the veggies are tender and slightly caramelized. Cooking is an art form and this is y

    5. Serve and Enjoy:
    Once everything is cooked to perfection, plate your vibrant skewers alongside a generous scoop of lemon-herb quinoa. Gather your fellow adventurers around the fire, share tales of your day, and dig in! The flavors will transport you to Mediterranean shores—every bite is a celebration of nature’s bounty.

    Bonus Tip:

    If you’re feeling extra adventurous, pack some feta cheese to crumble over the skewers before serving. It adds a creamy, tangy twist that’ll have you dreaming of azure waters and sun-soaked beaches.

    So grab your gear, ignite that fire, and let the Mediterranean magic unfold! Happy camping! 

    The Adventure Machine

    References/Further Study:

    https://my.clevelandclinic.org/health/articles/16037-mediterranean-diet

    https://www.mayoclinic.org/healthy-lifestyle/nutrition-and-healthy-eating/in-depth/mediterranean-diet/art-20047801

  • Homemade Sugar and Honey Face Exfoliate Recipe: Radiant Skin Delight

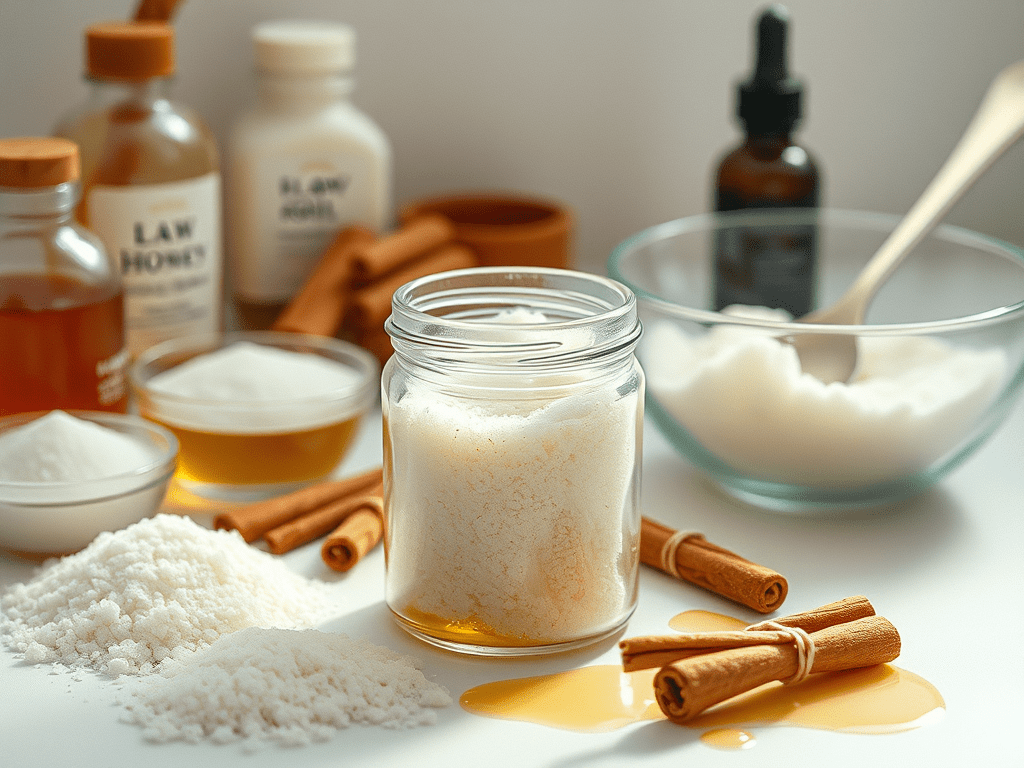
    Prepare to embark on a delightful journey to radiant skin! This enchanting exfoliate combines the sweet embrace of sugar and the golden allure of honey, creating a potion that will leave your face feeling as soft as a cloud and glowing like the sun. Gather your ingredients, unleash your inner alchemist, and let’s whip up this magical concoction! This is the perfect recipe for your traveling skincare.

    Ingredients
    • 1 cup of granulated sugar (white or brown, the choice is yours!)
    • 1/2 cup of raw honey (the more unfiltered, the better—seek out that liquid gold!)
    • 1 tablespoon of coconut oil (for an extra touch of hydration and a tropical twist)
    • 1 teaspoon of vanilla extract (optional, but oh-so-delightful)
    • A sprinkle of cinnamon or a few drops of essential oil (lavender or tea tree, for an aromatic adventure)
    Instructions:

    1. Gather Your Toolkit: Arm yourself with a mixing bowl and a spoon. Prepare your workspace like a true potion-maker—clean and organized, ready for the magic to unfold!

    2. Sugar Rush: Pour the granulated sugar into the mixing bowl. This will be the star of our exfoliating show, ready to slough away dead skin cells and reveal that fresh, vibrant face beneath.

    3. Golden Elixir: Add the raw honey. Watch as it cascades into the bowl like liquid sunshine! Honey not only adds sweetness, but it’s also a humectant, drawing moisture into your skin.

    4. Coconut Charm: Melt the coconut oil (if solid) and stir it in. This lush oil brings a tropical vibe and extra hydration, ensuring your skin feels nourished and loved.

    5. A Hint of Vanilla: If you’ve chosen to add vanilla extract, now’s the time! Stir it in to infuse your exfoliate with a warm, inviting scent that will transport you to a cozy kitchen filled with baked goods.

    6. Spice It Up: If you’re feeling adventurous, sprinkle in a dash of cinnamon or a few drops of your chosen essential oil. This is your potion, make it uniquely yours!

    7. Mix It Up: Combine all the ingredients until you achieve a thick, luscious paste. If it’s too runny, add a bit more sugar; if it’s too thick, a drizzle of honey will do the trick.

    8. The Application Ceremony: Before diving in, cleanse your face to remove any impurities. Then, using your fingers, gently massage the exfoliate onto your damp skin in circular motions. Let the sugar work its magic for about 5-10 minutes; this is your moment to relax and enjoy the heavenly scent!

    9. Rinse and Radiate: Rinse off with warm water, and voilà! Pat your face dry with a soft towel and admire your newly radiant complexion. You’ve just created a masterpiece!

    10. Storage for Future Adventures: If you have any leftovers (though we doubt you will!), store them in an airtight container in the fridge for up to a week. You can indulge in this sweet treatment once a week for best results!

    Pro Tip:

    For an extra touch of luxury, follow up with your favorite moisturizer or facial oil to seal in all that goodness. Your skin will thank you for this divine experience! My favorite moisturizer is….coconut oil. I can’t get enough of our Mother Nature’s natural bounty without added chemicals.

    Now go forth, brave explorer, and share your newfound radiance with the world! Your skin is ready to shine brighter than ever before!  This is a perfect concoction to offer to other travelers for a fair exchange.

    The Adventure Machine

    References/Further Study:

    https://naturalremedyideas.com

    https://www.healthline.com/nutrition/coconut-oil-and-skin

  • Top 10 Essential Items for Successful Solo Camping

    Solo camping can be an exhilarating and freeing experience, allowing you to connect with nature on a deeper level and test your survival skills. However, being out in the wilderness alone also means you need to be prepared for any situation that may arise. To ensure a successful solo camping trip, here are the top ten items that every solo camper must have:

    1. A reliable tent: A sturdy and weather-resistant tent is essential for providing shelter and protection from the elements. Look for a lightweight and easy-to-set-up tent that can withstand wind and rain.

    2. Sleeping bag: A warm and comfortable sleeping bag is crucial for a good night’s sleep in the great outdoors. Choose a sleeping bag that is suitable for the season and temperature range of your camping destination.

    3. Portable stove: A portable stove allows you to cook hot meals and boil water for drinking. Look for a lightweight and compact stove that is easy to transport.

    4. First aid kit: Accidents can happen when camping alone, so it’s important to have a well-stocked first aid kit with essentials like bandages, antiseptic wipes, and pain relievers.

    5. Multi-tool: A multi-tool is a versatile tool that can come in handy for various tasks while camping, such as cutting wood, opening cans, and fixing gear.

    6. Headlamp or flashlight: A reliable source of light is essential for navigating in the dark and finding your way around camp. A headlamp allows you to keep your hands free while lighting the way.

    7. Portable water filter: Access to clean drinking water is crucial for survival in the wilderness. A portable water filter or purification system ensures that you have a safe supply of water at all times.

    8. Navigation tools: A map and compass (or GPS device) are essential for navigating the wilderness and finding your way back to camp. Familiarize yourself with the area before setting out on your solo camping trip.

    9. Fire starter: A reliable fire starter, such as waterproof matches or a fire striker, is essential for cooking, keeping warm, and signaling for help in an emergency.

    10. Emergency communication device: In case of an emergency, it’s important to have a way to call for help. Consider bringing a satellite phone, personal locator beacon, or two-way radio for communication in remote areas.

    By packing these essential items, solo campers can be prepared for anything that comes their way while venturing into the wilderness alone. Remember to always leave a detailed itinerary with someone you trust and practice safe camping practices to ensure a successful and enjoyable solo camping trip.

    The Adventure Machine

    References/Further Study:

    https://www.rei.com/learn/expert-advice/ten-essentials.html

  • Chasing Monarchs: A Guide to Witnessing the Majestic Migration in Early November

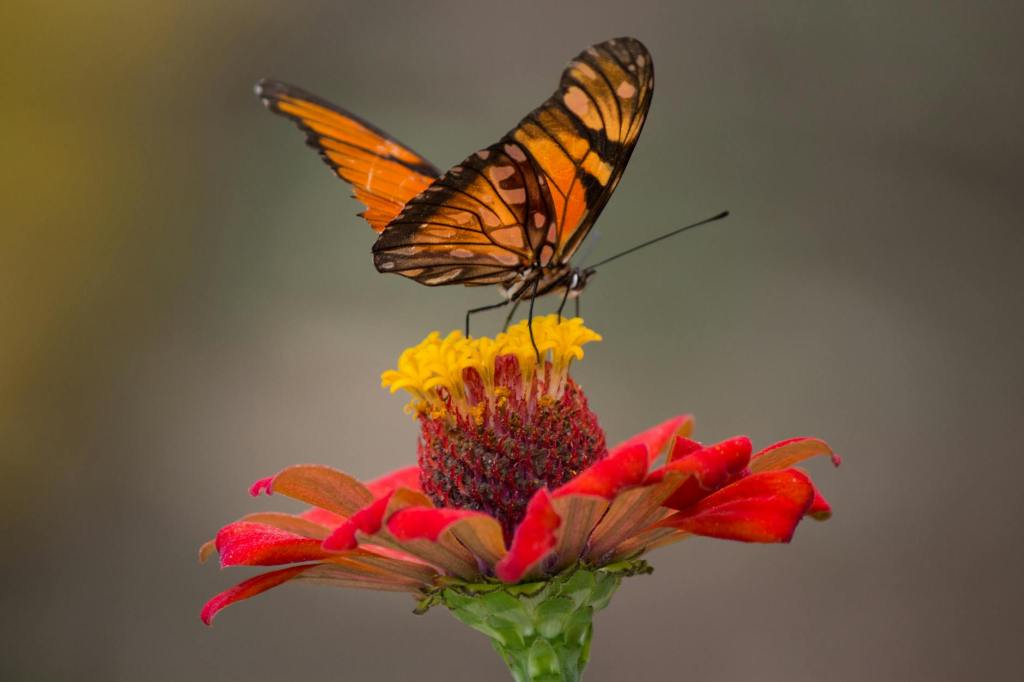
    As the last leaves of autumn flutter to the ground and the air grows crisp with the promise of winter, a miraculous spectacle begins: the migration of the monarch butterflies. These delicate orange-and-black winged wonders embark on a breathtaking journey from their breeding grounds in Canada and the northern United States to their winter sanctuary in Mexico. If you’re seeking an adventure this early November, you can witness this natural phenomenon without breaking the bank. Grab your hiking boots and a camera, because the best places to see monarchs are waiting for you!

    The Best Time for Monarch Viewing

    Timing is everything when planning your butterfly adventure. Early November marks the peak of the monarch migration, particularly on the eastern flyway. During this time, thousands of butterflies congregate in specific locations, taking advantage of favorable weather conditions before they continue their journey south. Typically, the best time to see them is in the late afternoon when they are most active, basking in the warm sun before settling down for the evening.

    Top Locations to Experience the Monarch Migration
    • Mission San Juan Capistrano, California: Home to a storied history and stunning architecture, Mission San Juan Capistrano is more than just a beautiful landmark; it’s a butterfly haven! Each year, thousands of monarchs flock to the eucalyptus trees surrounding the mission. The best part? Admission is only a modest fee, and the migratory butterflies are often visible in the nearby parks and gardens for free! Wander through the lush grounds, and you might just stumble upon clusters of these stunning insects clinging to branches, creating a living tapestry of color against the backdrop of California’s blue skies.
    • Cape May, New Jersey: As one of the premier spots on the East Coast for monarch sightings, Cape May is a charming seaside town that transforms into a butterfly paradise in November. The Cape May Bird Observatory offers free programs and guided walks where you can mingle with fellow butterfly enthusiasts. With a mix of coastal habitats, gardens, and parks, you can enjoy a variety of outdoor activities while spotting these fluttering beauties. Bring your binoculars, your sense of adventure, and perhaps even a picnic to enjoy while you watch the monarchs dance on the breeze!
    • Point Reyes National Seashore, California: If you crave an adventure that combines stunning coastal views with nature’s spectacular show, Point Reyes National Seashore is the place for you. Located just north of San Francisco, this rugged expanse of land offers breathtaking scenery and a chance to see migrating monarchs. The best viewing areas are at the Chimney Rock and the Elephant Seal Overlook. Pack a hearty lunch and make a day of it; the entry to Point Reyes is free, and the experience of watching monarchs glide along the coastline is priceless.
    • Katy Trail, Missouri: For those who want to experience the migration while enjoying a scenic bike ride, look no further than the Katy Trail State Park. Stretching 240 miles along the Missouri River, this trail is known for its beautiful landscapes and abundant wildlife, including migrating monarchs. As you pedal through the golden hues of fall, keep your eyes peeled for the butterflies dancing over fields of wildflowers. The trail is free to access, making it a budget-friendly option for adventure seekers who want to immerse themselves in nature.
    • Butterfly Gardens at the University of Florida, Gainesville: If you find yourself in the Sunshine State, the University of Florida’s Butterfly Gardens are a must-visit. These gardens are specifically designed to attract monarchs and other butterflies, providing a perfect environment for them to thrive during migration. Admission is free, and you can stroll through the gardens while taking in the beauty of various butterfly species. The enchanting atmosphere combined with the chance to witness these incredible insects makes it an ideal spot for nature lovers.
    Tips for Your Monarch Migration Adventure
    1. Dress for the Weather: November can be unpredictable; layers are your best friend. Be prepared for chilly mornings that warm up as the day progresses.
    2. Bring Essentials: A good camera, binoculars, water, and snacks will enhance your experience. Capture the magic of the butterflies and stay energized for a full day of exploration!
    3. Respect Nature: Keep a safe distance from the butterflies and their habitats. Observing without disturbing ensures that future generations can enjoy this breathtaking spectacle.
    Final Thoughts

    The migration of monarch butterflies is a magical event that beckons adventurers and nature lovers alike. With a little planning and a spirit of exploration, you can witness this awe-inspiring phenomenon without spending a fortune. So, lace up your hiking boots, grab your sense of wonder, and embark on an unforgettable journey to chase the monarchs this November. They await you, ready to dazzle and inspire!

    The Adventure Machine

    References/Further Study:

    https://monarchjointventure.org/monarch-biology/monarch-migration

    https://www.nationalgeographic.com/animals/article/monarch-butterfly-migration

    https://www.fs.usda.gov/wildflowers/pollinators/Monarch_Butterfly/migration/index.shtml

    https://en.wikipedia.org/wiki/Monarch_butterfly_migration

  • Taming the Wild: Your Ultimate Guide to Avoiding Ticks While Camping and Hiking

    As summer beckons adventurers into the great outdoors, the allure of hiking through lush forests and camping under a blanket of stars calls to the wild at heart. However, lurking in the underbrush are tiny, blood-sucking ticks ready to turn your outdoor escapades into an itchy nightmare. Fear not, brave explorers! With a sprinkle of knowledge and a dash of preparation, you can conquer the wilderness while keeping those pesky ticks at bay. Here’s how to embrace the adventure without the unwanted hitchhikers.

    Gear Up: The Right Attire

    Start your tick-free journey by suiting up in the right gear. Opt for light-colored clothing; it not only makes spotting ticks easier but also keeps you cooler under the sun. Choose long sleeves and long pants, and tuck your pants into your socks or boots, creating an impenetrable barrier against these tiny foes.

    When choosing fabrics, consider wearing tightly woven materials, which ticks find much harder to penetrate. Don’t forget a wide-brimmed hat to keep the sun off your face and shield your scalp.

    Choose Your Campsite Wisely

    Before you even pitch your tent, scout your surroundings! Ticks thrive in grassy, bushy areas and are often found in leaf litter. Set up camp in a dry, sunny spot away from dense vegetation. If possible, create a tick-safe zone by clearing away any brush or debris around your campsite.

    The Natural Deterrent: DIY Tick Repellent

    For those who prefer to keep chemicals off their skin and gear, a natural tick repellent is just a mix away!

    Essential Oil Tick Repellent Recipe:

    • 10 drops of citronella essential oil
    • 10 drops of eucalyptus essential oil
    • 10 drops of lavender essential oil
    • 2 tablespoons of witch hazel or vodka (for preservation)
    • 2 tablespoons of distilled water

    1. Combine the essential oils and witch hazel in a small spray bottle.
    2. Add the distilled water and shake well before each use.
    3. Spray generously on exposed skin and clothing before heading out.

    This blend not only smells great but also acts as a potent natural deterrent, making you less appealing to ticks.

    Keep Ticks Out of Your Vehicle and Clothes

    Once you’ve conquered the trails, it’s essential to keep ticks from hitching a ride in your vehicle or clothing. After a day of adventure, conduct a thorough tick check before hopping back into your car. Pay special attention to areas like the scalp, behind the ears, armpits, and along the waistband—ticks love these warm, hidden nooks.

    To minimize tick transfers, keep your gear organized. Store your clothes in sealed bags or containers until you get home. When you return, toss your clothes directly into the wash on high heat to eliminate any unwanted visitors.

    Protect Your Furry Companions

    Your four-legged adventure buddies deserve the same protection as you! There are several natural methods to keep ticks off your pets:

    • DIY Pet Spray: Use the same essential oil mixture from the tick repellent recipe above. Just ensure it’s diluted properly and safe for pets. Spray it on their fur (avoiding the eyes and nose) before heading out.
    • Regular Grooming: Brush your pet’s fur daily when you return from outdoor excursions. This not only helps to remove any ticks before they latch on but also strengthens your bond with your furry friend.
    • Tick Checks: Make it a habit to check your pets for ticks after each adventure. Pay close attention to areas where ticks commonly hide, such as between their toes, under their collars, and around their ears.
    Final Thoughts: Embrace the Adventure, Not the Ticks

    The great outdoors is calling, and with these practical tips, you can enjoy your camping and hiking experiences without the worry of ticks ruining the fun. Equip yourself with knowledge, gear up properly, and harness the power of natural repellents.

    So, lace up those boots, grab your backpack, and venture into the wild—just remember, the only thing that should be hitching a ride on your journey is the spirit of adventure! Happy trails, and may your expeditions be tick-free!

    The Adventure Machine

    References/Further Study:

    https://medlineplus.gov/tickbites.html

  • Create Your Own Non-Toxic Soap for Skin and Hair

    Are you tired of using store-bought soaps that are filled with harsh chemicals and artificial fragrances? Do you want to take control of what goes on your skin and hair? Well, it’s time to get creative and make your own non-toxic soap at home!

    Making your own soap may sound intimidating, but it’s actually quite simple and fun. Plus, you can customize your soap to suit your skin and hair needs. Say goodbye to dry, irritated skin and hello to soft, glowing skin and luscious locks.

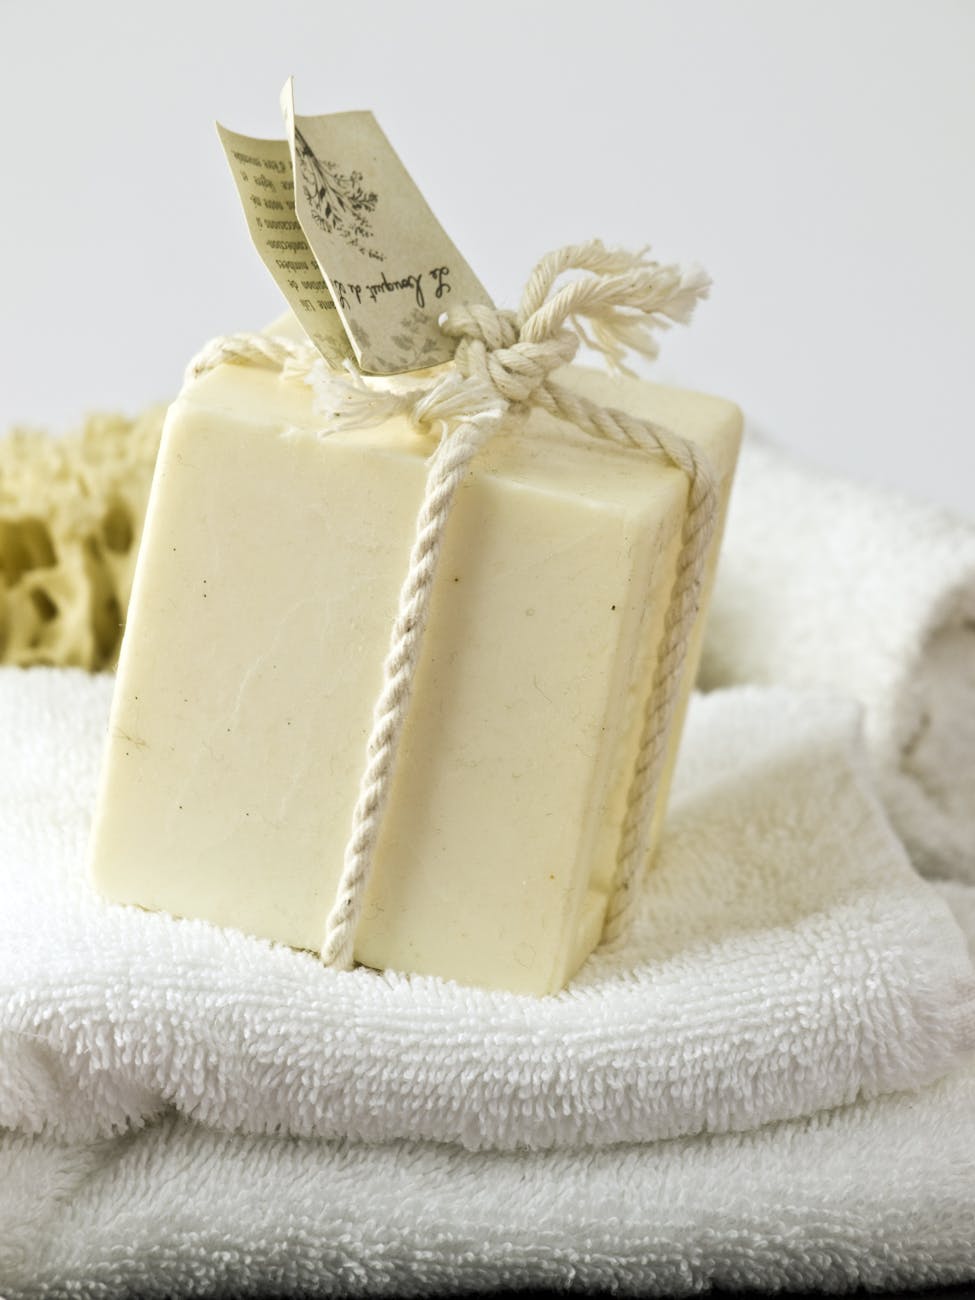
    For a non-toxic soap recipe that is gentle on your skin, try using a combination of coconut oil, olive oil, and shea butter. These ingredients are known for their moisturizing properties and will leave your skin feeling nourished and hydrated. You can also add essential oils like lavender or tea tree for a calming or refreshing scent.

    To make your own non-toxic soap for hair, consider using ingredients like castor oil, jojoba oil, and avocado oil. These oils are great for promoting hair growth, moisturizing the scalp, and adding shine to your locks. You can also add herbs like rosemary or peppermint for added benefits.

    When making your own soap, be sure to use high-quality ingredients and follow a trusted recipe. It’s important to carefully measure your ingredients and follow the instructions to ensure that your soap turns out well. You can find plenty of recipes and tutorials online or in books on soap making.

    So, why not embark on a soap-making adventure and create your own non-toxic soap for skin and hair? Your skin and hair will thank you for it! If soap making is not on your bucket list – buy from local crafters. They spend a lot of time perfecting their techniques to bring you the best most luxurious soap that doesn’t have those harmful chemicals that are bad for your skin. Spend more, buy less, use better! Your body will thank you for it.

    The Adventure Machine

    References/Further Study:

    https://food52.com/blog/12919-how-to-make-soap-at-home-even-if-you-failed-chemistry

  • Gold Panning for Beginners: Essential Equipment and Best Locations

    Are you ready to embark on a thrilling treasure hunt in search of the elusive gold? Well, grab your gear and get ready to learn the art of panning for gold! This exciting activity is not only a great way to spend time in nature but also a potential way to strike it rich. So, if you’re a beginner looking to try your hand at gold panning, here’s everything you need to know to get started.

    First things first, you’ll need the right equipment to successfully pan for gold. The most essential tool you’ll need is a gold pan. When choosing a gold pan, opt for a plastic pan with riffles along the side. These riffles help trap the gold as you sift through the sediment. Additionally, a pan with a wide base and shallow sides is ideal for beginners, as it makes it easier to see and collect the gold.

    In addition to a gold pan, you’ll also need a few other tools to aid in your gold panning adventure. A classifier or sieve is essential for sifting through the sediment and separating the larger rocks and debris from the finer material that may contain gold. A snuffer bottle or tweezers are handy for picking up small gold flakes, while a small shovel or trowel can help you dig into the sediment.

    Now that you have your gear ready, it’s time to head out to the best areas for gold panning. Some of the best places to pan for gold include rivers and streams with a history of gold deposits. Popular gold panning locations include the American River in California, the Fraser River in British Columbia, and the Rogue River in Oregon. These areas are known for their rich gold deposits and are frequented by seasoned prospectors and beginners alike.

    While gold panning can be an exhilarating experience, it’s important to be aware of the pros and cons of this activity. One of the pros of gold panning is the thrill of potentially finding valuable gold flakes or nuggets. It’s also a great way to spend time outdoors and connect with nature. However, one of the cons of gold panning is that it can be time-consuming and physically demanding. It also requires patience and a keen eye for spotting gold amidst the sediment.

    My mother was a huge fan of gold panning in her life and it brought her a lot of joy. I have numerous former acquaintances through work that actually were successful in panning and finding gold, enough to replace any overtime work. But putting the thrill aside of the potential of finding gold, it is a wonderful activity to be out in nature. Being around a healthy, pure running water source and absorbing the nature embracing you – this is what it is all about. Maybe you will find some gold, or maybe a wonderful rock for your collection. But the biggest find will be the experience, creating another good memory for your book of life.

    In conclusion, gold panning is a fun and exciting activity that can lead to the discovery of valuable gold. With the right equipment and a sense of adventure, beginners can try their hand at panning for gold in some of the best locations around the world. So, grab your gear, head out to the rivers and streams, and start your gold panning journey today!

    The Adventure Machine

    References/Further Study:

  • Soy Wax: The Healthiest and Safest Choice for Candle Making

    Candle making is a fun and creative hobby that allows you to customize your own scents, colors, and designs. However, when it comes to choosing materials for your candles, it’s important to consider not only cost but also toxicity levels. After all, you don’t want to be filling your home with harmful chemicals every time you light a candle.

    The least toxic material to use when making candles is soy wax. Soy wax is a natural, renewable resource made from soybean oil. It burns cleaner and longer than paraffin wax, which is derived from petroleum, making it a healthier choice for both you and the environment. In addition, soy wax is biodegradable and easy to clean up if spilled.

    Now, let’s break down the cost and toxicity levels of different candle-making materials, from cheapest to most expensive and healthiest to least healthy:

    1. Paraffin Wax: Paraffin wax is the cheapest material to use for candle making, but it is also the most toxic. When burned, paraffin wax releases harmful chemicals such as benzene and toluene, which can be carcinogenic. It is best to avoid using paraffin wax if possible.

    2. Beeswax: Beeswax is a natural and sustainable material that is slightly more expensive than paraffin wax. It burns cleaner and longer than paraffin wax, but some people may be allergic to it. Beeswax is a healthier choice compared to paraffin wax, but it is not as eco-friendly as soy wax.

    3. Coconut Wax: Coconut wax is a more expensive option for candle making, but it is considered to be healthier than paraffin wax. It burns cleanly and has a subtle coconut scent. Coconut wax is a good choice for those looking for a natural and sustainable alternative to paraffin wax.

    4. Soy Wax: Soy wax is the most expensive material to use for candle making, but it is also the healthiest. Soy wax is non-toxic, biodegradable, and burns cleaner and longer than paraffin wax. It is a safe choice for those with allergies or respiratory issues, as it does not release harmful chemicals when burned.

    In conclusion, when it comes to candle making, it’s worth investing in a healthier and more sustainable material like soy wax. Not only will you be creating a safer environment for yourself and your loved ones, but you’ll also be supporting sustainable agriculture. So, get creative and start making your own soy wax candles today!

    The Adventure Machine

    References/Further Study:

    https://www.marthastewart.com/8061950/candle-wax-type-guide#:~:text=Paraffin%20wax%E2%80%94a%20very%20inexpensive,candles%2C%20from%20containers%20to%20pillars.

  • 10 Creative Ways to Use Mason Jars for Home Decor

    Mason jars are not just for canning anymore! These versatile glass jars can be used in a variety of creative ways to add a touch of charm and personality to your home decor. From simple centerpieces to outdoor lighting, here are 10 ways you can use mason jars to decorate your space.

    1. Flower Vases – Fill mason jars with fresh flowers for a simple and rustic centerpiece. You can mix and match different sized jars for a more eclectic look.

    2. Candle Holders – Place tea lights or votive candles inside mason jars for a cozy and romantic ambiance. You can also add decorative elements like sand, shells, or pebbles to the bottom of the jars for a beachy feel.

    3. Herb Garden – Use mason jars to create a mini herb garden in your kitchen. Simply plant your favorite herbs in the jars and place them on a sunny windowsill.

    4. Bathroom Storage – Organize your bathroom essentials like cotton balls, Q-tips, and makeup brushes in mason jars. You can also add labels or decorative ribbons to customize the jars.

    5. Terrariums – Create your own mini ecosystem by layering soil, rocks, and small plants inside a mason jar. Terrariums are easy to maintain and add a touch of greenery to any space.

    6. Mason Jar Chandelier – Turn a cluster of mason jars into a unique and eye-catching chandelier. Simply attach the jars to a wooden plank or metal frame and hang it from the ceiling.

    7. Mason Jar Lanterns – Create outdoor lighting by placing battery-operated tea lights inside mason jars. Hang the jars from tree branches or string them along a fence for a magical glow.

    8. Painted Mason Jars – Get creative by painting mason jars in your favorite colors or patterns. Use acrylic paint or spray paint to customize the jars to match your decor.

    9. Photo Display – Fill mason jars with sand or marbles and add photos or postcards for a fun and interactive display. You can change out the photos seasonally or whenever you feel like updating your decor.

    10. Mason Jar Terrariums – Create your own mini ecosystem by layering soil, rocks, and small plants inside a mason jar. Terrariums are easy to maintain and add a touch of greenery to any space.

    With a little imagination and creativity, mason jars can be transformed into beautiful and functional decor pieces for your home. So grab a few jars, gather your supplies, and let your creativity run wild! Even while on the road, mason jars are a handy, multi-purpose, decorative must have – and adds ambiance to any small space.

    The Adventure Machine

    References/Further Study:

    https://www.allrecipes.com/article/mason-jars-sustainable-food-storage-containers